
In the world of flexible printed circuits (FPCs), achieving the perfect balance between flexibility and rigidity is often critical for both performance and reliability. Flex circuit stiffeners—selectively applied rigid reinforcements—are the unsung heroes that make this possible. They provide structural support to delicate flex areas, facilitate component mounting, and ensure successful connector mating, all while maintaining the circuit’s dynamic bending capabilities where needed. However, designing an effective stiffener requires careful consideration of materials, mechanics, and manufacturability. This guide outlines essential best practices for FPC reinforcement to help you avoid common pitfalls and design robust, reliable flexible assemblies.
What Are Flex Circuit Stiffeners and Why Are They Crucial?
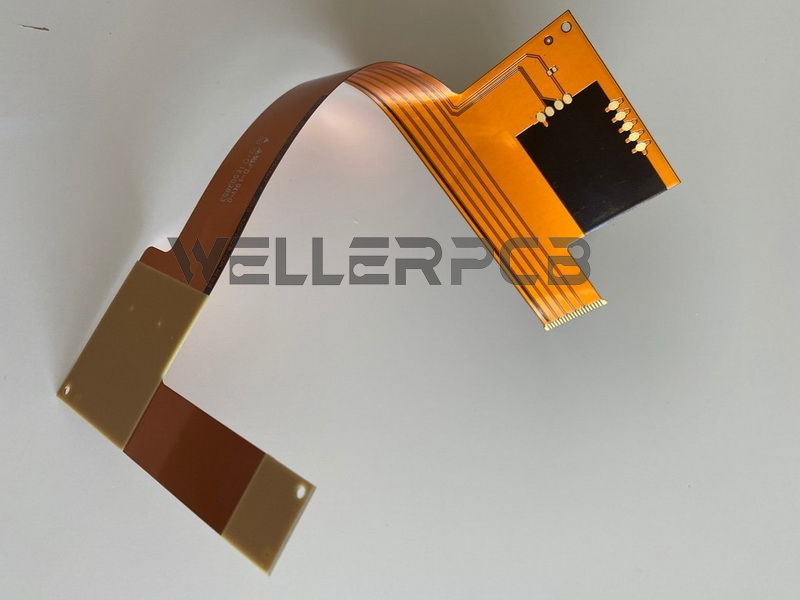
A stiffener is a piece of rigid or semi-rigid material laminated to specific areas of a flexible circuit. Unlike a rigid-flex PCB which integrates rigid layers into the fabrication process, stiffeners are typically added as a secondary bonding operation. Their primary functions are:
Providing a Stable Platform for Components:
Surface-mount devices (SMDs), connectors, and pin headers require a flat, firm surface for reliable soldering and mechanical stability.
Improving Handleability:
They prevent thin, floppy flex areas from twisting or folding during assembly, making automated handling easier.
Enhancing Connector Engagement:
EnhanThey add necessary thickness and rigidity at connector insertion points to prevent buckling and ensure a secure, repeated mate/unmate cycle.
Relieving Strain:
Strategically placed stiffeners can localize bend areas and prevent stress from propagating into soldered joints or critical traces.
Aiding in Heat Dissipation:
Certain materials, like aluminum, can act as a heat spreader for power components.
Best Practice #1: Selecting the Right Stiffener Material
The choice of material directly impacts cost, weight, thermal performance, and manufacturability.
FR-4 (Glass Epoxy):
The most common and cost-effective choice. Its CTE (Coefficient of Thermal Expansion) is well-matched to standard PCB materials, minimizing stress during thermal cycling. Available in various thicknesses (typical range: 0.2mm to 2.0mm).
Polyimide (PI):
Offers excellent thermal stability and flexibility in thinner gauges. Used when a semi-rigid reinforcement is needed or when a perfectly matched CTE with the polyimide base film is critical for high-reliability applications.
Aluminum:
Used for its exceptional thermal conductivity and electromagnetic shielding (EMI) properties. Ideal for reinforcing areas with high-power components. Must be anodized or coated to prevent electrical shorts and ensure adhesive bonding.
Stainless Steel:
Provides extreme mechanical rigidity and durability in harsh environments. Used in applications subject to high vibration, abrasion, or where a very thin yet strong reinforcement is needed.


Design Guideline: Match the material to the primary need—FR-4 for general-purpose SMT areas, Polyimide for dynamic flex zones needing mild support, and Metal for thermal or ultra-rigid requirements.
Best Practice #2: Specifying Thickness and Geometry
Thickness is the primary driver of rigidity. The bending stiffness of a plate increases with the cube of its thickness. A small increase in thickness results in a significant gain in rigidity.
Typical Thicknesses:
FR-4 stiffeners commonly range from 0.5mm to 1.6mm. For connector areas, follow the connector manufacturer's recommendation, often aiming to achieve the final thickness specified in the connector's mating interface drawing.
Geometry & Outline:
The stiffener outline should extend beyond the component or connector area by at least 1.0-2.0mm. This provides adequate support and prevents stress concentration at the stiffener's edge. Corners should have a minimum radius of 0.5mm to prevent peeling and improve adhesive flow during lamination.
Tapered Edges:
For stiffeners in or near bend areas, specifying a tapered (or beveled) edge profile dramatically reduces stress concentration, preventing the sharp edge from cracking the coverlay or acting as a hinge point. A 30-45 degree taper is typical.
Best Practice #3: Mastering the Adhesive & Bonding Process
A stiffener is only as good as its bond to the flex. Delamination is a primary failure mode.
Adhesive Types:
AdhPressure-sensitive adhesives (PSA) are common and easy to apply, but offer lower thermal and chemical resistance. Thermoset adhesives (like acrylic or epoxy films, often pre-coated on the stiffener) provide a stronger, more durable bond suitable for solder reflow processes and harsh environments.
Lamination Process:
Ensure even pressure and controlled heat during lamination to void-free bonds. The adhesive layer should be slightly smaller than the stiffener to prevent squeeze-out, which can interfere with connectors or assembly.
Access Holes & Alignment:
AcIf SMT components are on the opposite side of the stiffener, design access holes (relief openings) in the stiffener to allow for solder reflow and cleaning. Use clear fiducial markersand alignment features in your flex design to ensure stiffeners are placed with high precision (±0.2mm tolerance).


Best Practice #4: Integration into Overall Flex Design
Stiffeners should not be an afterthought. Integrate them early in the layout phase.
Bend Radius Consideration:
Ensure the stiffener is placed outside the minimum bend area. The neutral bending axis shifts at the stiffener's edge, creating a high-stress zone. Maintain a safe distance (often 3-5x the flex thickness) between the stiffener edge and the start of the bend.
Stack-up Symmetry:
When applying stiffeners on both sides of a flex (e.g., for a double-sided assembly), try to make them symmetrical in location and thickness to prevent warping or curling.
Collaboration with Manufacturer:
Early engagement with your Flex PCB manufacturer is vital. They can advise on their standard material inventories, lamination capabilities, and provide specific Design for Manufacturability (DFM) feedback on your stiffener design.
Conclusion: Reinforcement for Success
FAQ Flex Circuit Stiffeners
Q: Can a stiffener be placed in a dynamic bend area?
A: Generally, no. Stiffeners are for rigid support. Placing one in a dynamic bend area will concentrate stress at its edges, leading to rapid flex circuit failure. For controlled bending, use a selective rigidization technique or ensure the stiffener is entirely outside the flex zone.
Q: How is a stiffener different from a Rigid-Flex construction?
A: A stiffener is an externally laminated piece added after the flex is fabricated. A Rigid-Flex board has rigid layers (FR-4) integrally layered and bonded with the flex layers during the multilayer lamination process, creating a single, monolithic structure. Rigid-flex is more permanent, reliable for complex 3D shapes, and often used in high-end applications, while stiffeners are a more modular and cost-effective solution for local reinforcement.
Q: What file format should I use to define stiffeners in my design?
A: Provide a dedicated mechanical layer in your Gerber or ODB++ files that clearly outlines the stiffener shape, material, and thickness specification. Always include a detailed fabrication drawing with callouts for all reinforcement requirements.


