
In the world of printed circuit board assembly (PCBA), cleanliness is not just about aesthetics—it’s a critical factor in reliability and performance. Even minute amounts of flux residue, ionic contaminants, or particulate matter can lead to electrochemical migration, current leakage, and ultimately, catastrophic board failure. Among the various cleaning methods available, ultrasonic cleaning on PCBA stands out for its exceptional ability to reach where brushes and sprays cannot.


However, there’s considerable debate about its safety. When used incorrectly, ultrasonic energy can damage delicate components and weaken solder joints. So, when should you use ultrasonic cleaning, and how can you implement it safely?
This comprehensive guide explores the science behind ultrasonic cleaning for PCBA, its significant benefits, potential risks, and the essential best practices to ensure your circuit boards come out perfectly clean without any damage.
How Does Ultrasonic Cleaning Work?
Ultrasonic cleaning utilizes the power of high-frequency sound waves to agitate a liquid cleaning solution. Here’s the scientific breakdown of the process:
Transducer Generation:
The ultrasonic cleaner contains transducers that convert electrical energy into high-frequency sound waves, typically in the range of 25 kHz to 80 kHz for electronic cleaning.
For example: Hazard of Ultrasonic Cleaning for Inductor-Coil Assembled PCBs: The process poses a reliability risk due to resonant vibrations, which can: 1) cause fatigue failure in fine-gauge wire windings, and 2) propagate cracks in the brittle ferrite or powdered-iron core material.
Cavitation Formation:
Cavitation Formation: These sound waves create millions of microscopic bubbles in the cleaning fluid—a process known as cavitation. These bubbles form in the alternating high-pressure and low-pressure cycles of the sound waves.
Implosion and Scouring:
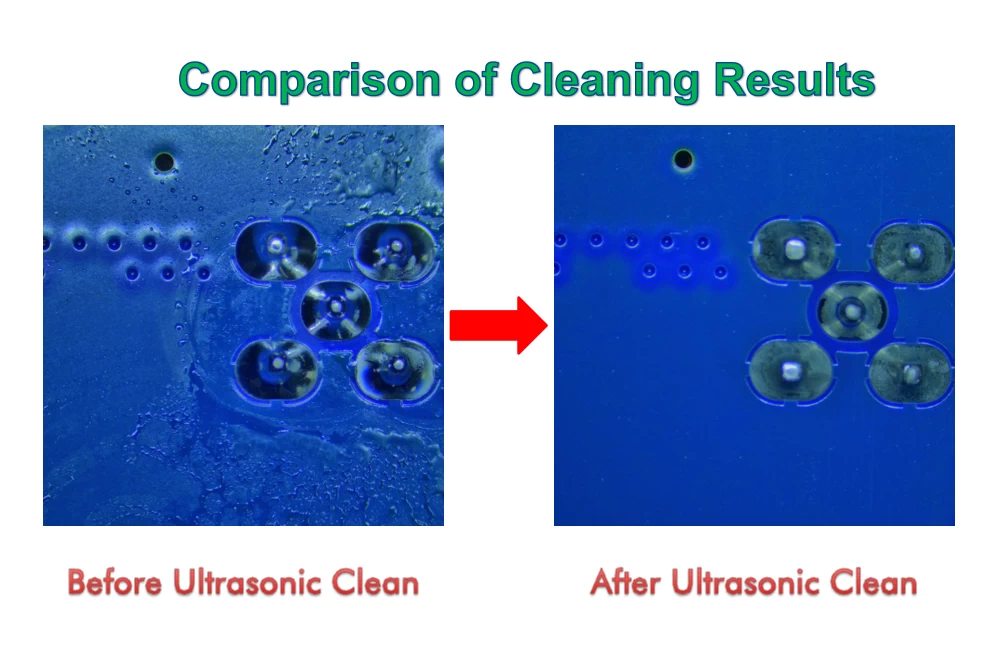
The bubbles grow rapidly and then violently implode. This implosion creates intense, localized micro-jets of cleaning fluid that impact every surface of the PCBA. This powerful scouring action dislodges contaminants from even the most hard-to-reach areas, such as underneath low-standoff components and within fine-pitch leads.
Benefits of Ultrasonic Cleaning for PCBA
When applied correctly, ultrasonic cleaning offers unparalleled advantages:
Superior Penetration:
It is the most effective method for cleaning complex, high-density assemblies with tight crevices and blind vias that are impossible to clean with other methods.
Thorough Contaminant Removal:
It efficiently removes a wide range of contaminants, including:
- Flux residues (both no-clean and water-soluble)
- Oils and greases
- Dust and particulate matter
- Some ionic contaminants
Consistent Results:
The process is highly repeatable and automated, eliminating human error and ensuring every board receives the same level of cleanliness.
Increased Throughput:
Multiple boards can be cleaned in a single batch, making it highly efficient for medium to high-volume production.
The Risks and How to Mitigate Them
Component Damage:
It is the most effective method for cleaning complex, high-density assemblies with tight crevices and blind vias that are impossible to clean with other methods.
Thorough Contaminant Removal:
The intense energy from imploding bubbles can crack ceramic capacitors, damage wire bonds in ICs, and erode vulnerable surfaces.
Solder Joint Weakening:
In rare cases, prolonged exposure can fatigue delicate solder joints.
These risks can be effectively managed by adhering to strict protocols:
Risk Factor
Mitigation Strategy
Excessive Energy
Use lower frequencies (40-80 kHz) for delicate electronics instead of higher frequencies used for industrial cleaning.
Prolonged Exposure
Limit cleaning cycles to short bursts (2-5 minutes). Longer is not better.
Component Vulnerability
Avoid using ultrasonic cleaning on boards with delicate components like MEMS sensors, crystals, or microphones.
Solution Chemistry
Use mild, electronics-grade, non-corrosive cleaning solutions that are compatible with all board materials.
A Step-by-Step Guide to the Ultrasonic Cleaning Process
A successful ultrasonic cleaning process involves more than just submerging a circuit board and turning on the machine.
Pre-Cleaning Inspection:
Visually inspect the board for obvious damage or loose components.
Solution Preparation:
Fill the ultrasonic tank with the recommended cleaning solution (often a deionized water-based detergent). Heat the solution to the manufacturer's specified temperature (typically 50-65°C / 122-149°F) to enhance cleaning efficacy.
Loading the PCBA:
Place the boards securely in a dedicated basket or fixture. Ensure they do not touch the bottom or walls of the tank and are fully submerged. PCB Boards can be positioned vertically for optimal drainage.
The Cleaning Cycle:
Activate the ultrasonic cleaner for a predetermined time, usually 2 to 5 minutes. Agitation or basket rotation can further improve results.
Rinsing:
Rinsing: This is a critical step. Immediately after the ultrasonic cycle, rinse the PCBA thoroughly with deionized (DI) water to remove any residual cleaning solution and dislodged contaminants.
Drying:
Use an oven or a dedicated dryer to completely remove all moisture. Forced-air drying is also an option. Ensure the board is 100% dry before proceeding to inspection or conformal coating.
Best Practices for Safe and Effective Ultrasonic Cleaning
To maximize benefits and eliminate risks, follow these best practices
Know Your Components:
Always review your Bill of Materials (BOM) for components that are incompatible with ultrasonic cleaning.
Validate the Process:
Before running a full batch, perform a cleaning validation on a non-critical or test board. Use techniques like Ion Chromatography or Resistivity of Solvent Extract (ROSE) testing to quantify cleanliness.
Maintain Your Equipment:
Regularly clean the tank to prevent contaminant buildup and degas the solution before cleaning to maximize cavitation efficiency.
Do Not Use on Live or Powered Boards:
Ensure boards are completely passive during the cleaning process.
Conclusion: Is Ultrasonic Cleaning Right for Your PCBA?
Ultrasonic cleaning is a powerful tool in the PCBA manufacturer’s arsenal. For standard industrial boards, ruggedized electronics, and assemblies that must meet the highest reliability standards, it provides a level of cleanliness that is difficult to achieve otherwise.
However, it is not a one-size-fits-all solution. For boards with extremely delicate components or those not exposed to harsh environments, alternative methods like inline spray washing may be more appropriate.
Partner with an expert who understands the balance. At WELLER, we have the experience and equipment to evaluate your specific PCBA and recommend the optimal cleaning process—whether ultrasonic or alternative—to ensure the long-term reliability and performance of your products. Contact us today to discuss your PCBA assembly and cleaning requirements.


